Images

Frames From the Film Footlocker #1: The 1994 Solar Eclipse

Image result for photo cd
Vintage tech: at least it’s not on vinyl

Back in the old film days, I had a number of solar eclipse frames burned to Kodak Photo CD thinking I’d process them in Photoshop someday.  With next year’s eclipse nearing, I thought now would be a good time to play with these old images.

I had thought Photo CD would be around for a while, yet these days it’s pretty hard to find a program that can even open the images.  Kodak abandoned the proprietary format over a decade ago but thankfully somebody reverse engineered it.  I used Irfanview to convert to tiffs.

A solar eclipse has a vast dynamic range.  You need long exposures to get the outer corona, but then you overexpose the inner corona.   Here’s my longest exposure of the 1994 Eclipse taken in Bolivia (1000mm Meade 97E/Nikon F3 on a Bogen tripod).  I should have taken even longer exposures.  I think this was two seconds on 100 ASA:

eclipse-1994-long-exposure
Inner corona is overexposed

Four seconds without tracking would have been pushing it a little, but I wonder how much more of that left streamer I could have got.

So you take many exposures: first short ones for the prominences and inner corona, and then each one a step or so longer.  Here are the exposures I selected for this project.  It was very hard to align them, especially since I rotated the camera after my first series to fit the corona in the frame (not a pleasant undertaking during totality).

stack-6_800
Photo CD: Dead. Animated GIFs: Still going strong

I used the technique described by Jerry Lodriguss at his website.  Here’s my composite of radial blur subtractions that bring out the corona detail.difference-composite
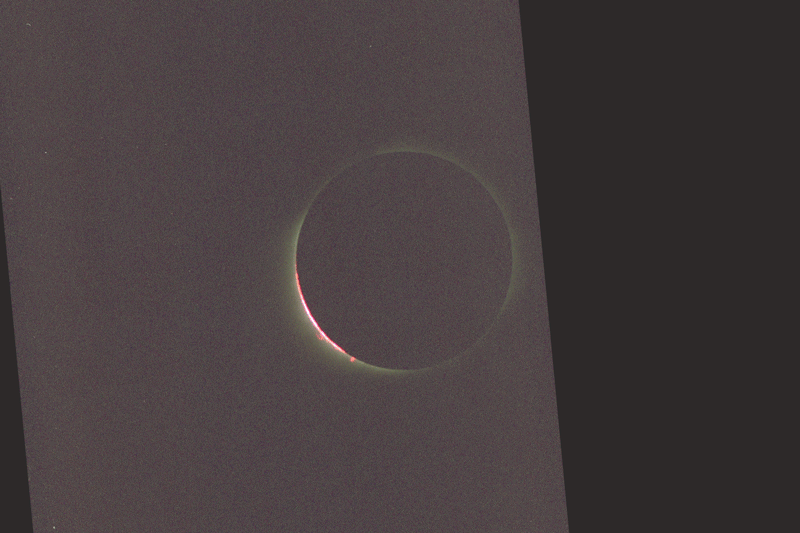
Here’s a striking but fanciful image combining blurred subtraction with originals:final-imageI don’t remember seeing a lot of black between the corona streamers during the eclipse, so I tried to get a more realistic image.  It’s hard to get rid of the black, keep the detail, and keep the bright areas from washing out.  Here’s my attempt:

eclipse-1994-2And the long exposure again for comparison:eclipse-1994-long-exposureI’m not completely satisfied, but it will do for now.  If this exercise has taught me one thing, it’s that I want to study the next eclipse I see carefully to mentally capture, as much as possible, how it looks to the eye.  Maybe even sketch it.  With luck, I’ll have the chance next August.


Goodbye Summer

My three months without a post have largely been due to the near constant presence of @KarltheFog here in the Bay Area, a particularly summertime phenomenon.  I’m entering into a new season in my hobby as well, switching from the fork mount that came with my C8, to a German Equitorial Mount.  I’d been looking for a budget GEM for a few months when my dad mentioned he had an old but unused Meade LXD-75 laying around.  Thanks Dad!

Pics of the mount and handset mod in a later post.  The GEM is lighter, easier to set-up and take-down, has a decent payload capacity, and can be used with other scopes like my AT66ED f/6.   What really convinced me to ditch the fork was trying to piggyback the AT-66 on the C8.  It’s light, but not that light.   With the Autostar hand controller the new mount is also a “goto,” meaning I select “North American Nebula” and it goes there.  I feel a little unclean, but I knew the day would come.  Anybody want a C8 fork w/o the OTA?  Check the Cloudy Nights Classifieds soon…

Anyway, here’s the first pic off the new mount.  400mm, 3 minute exposures, 10 or so subs, ISO 1600, Meade filter.  North American NebulaGot a little coma on the left.  Maybe my filter was askew?

San Diego #2: Rho Ophiuchi Cloud

I spent two nights imaging at the end of a road near the boarder east of San Diego, trying to avoid the flashlights and headlights of La Migra (I did draw some attention).  My previous post is from the second night.  This image is from the first, where I was just getting the hang of the new mount.  It has a polar alignment scope, but I guessed wrong about where to put Polaris on the reticle so these didn’t track as well as night #2 images of the galactic core.  For that one, I got the Mercury transit times from the Naval Observatory and made sure of how the polar scope was flipping the view (upside down and backwards).

As it wasn’t aligned well, I noticed slight trails at five minutes so I shot three minute exposures.  Turns out this is a bit short for Rho Ophiuchi nebulosity, so I really had to crank up the gain in the post processing.  The bright object at top is Saturn, the red one Antares, and M4 to the right of that.

100mm, 180sec, f2.8, ISO 400


Back to Orion

I hadn’t really tackled Orion since I first started taking pictures again two years ago, and that was a lazy image of the bright Orion Nebula through the C8.  I spent this Summer and Fall anticipating the hunter, wanting to take a crack at the fainter nebulae.  I especially wanted to see how well I could get Barnard’s Loop from my backyard.

Unfortunately what is good for California’s drought is not good for deep sky imaging, and the frequent rains and clouds driven by El Niño have had me focused more on equipment mods than sky shots.  I’ve watched Orion drift to the west over the last two months during the infrequent breaks from the clouds and moon.

But it did clear up this week (Happy Lunar New Year!) for two crystal moonless nights.  I shot with the 50mm one night to try to get Barnard’s Loop.  Still figuring out how to best post-process that one.  The other night I shot the belt and sword with the 100mm.  Here’s that one, heavily cropped.  I mainly wanted the Horsehead, but M42 is nice as well.  f/3.5, ISO 800 (2 minute subs, Meade filter)

Horsehead and Orion Nebula

Veil Nebula, with Filters and New Lens

I wanted a good test of the Oiii filter, and the Veil seemed an ideal subject before the season wore on and the opportunity passed.  I was also able to play around with taking exposures through different filters and combining them.  Finally, this is my first attempt with the new 100mm f/2 lens.   The location is Albany, CA, with its typically light polluted sky.

With the Meade Nebular Narrowband, I had about 40 minutes worth of 20 second subs:

151004 Veil Meade

With the Celestron Oiii line filter, 50 minutes of 20 sec subs:

151004 Veil OiiiAnd here is an image with both of these images combined, using luminosity blending in Photoshop.

151004 Veil Combined

I had tried stacking everything together in Deep Sky Stacker (Oiii subs, Meade narrowband subs, and the darks/flats/bias) just to see what would happen.  It didn’t work so well, giving a weird checkerboard, and isn’t worth posting.

Overall, I found it interesting that the Oiii provided a lot of detail (especially above 42 Cyg) that the other filter did not show.  But that they complimented each other well.

Spectrograph Build

As promised, here’s how I put the spectrograph together.  I’ve been using this latest toy to see how my filters transmit and block light.  I went mainly with  a design from makezine.com with minor design changes.

Instead of plumbing PVC, I used some left over central vac pvc which was lighter.  I already had purchased some 1000 line per mm diffraction grating film.  To cut the film and its frame and the disk with a slit where the light enters, I used the compass cutter (already making itself useful after the last project I bought it for!)1. cutting the frameGluing the diffraction grating onto the frame.  Impatient, so I used super glue.2. Superglue in placeI cut the slit for the distal end of the spectrograph using two razor blades with a piece of card stock in between.cutting the slit


Diffracframe in placetion grating in place!  Actually, in the wrong place.  You’re supposed to view it at an angle, not put the diffraction grating off the light path.  Nothing is glued in place, so easy enough to move things around until I figure out what’s going on…


Here’s one of the filters in front of the slit at the endfilter on top.  Not having the slit fully covered by the filter allows for you to see the full spectrum of the light source in thin lines above and below the filtered spectrum (see example below).  Not that I planned it that way.


spectrographing

Here it is in action, with a bright Compact Fluorescent lighting up some paper in front of it.  CFLs have nice emission lines to calibrate with and you can even see them on the camera LCD screen in this picture.  The CFL does not have strong wavelengths in the range of the Oiii filter I’m testing, so I’m shining an LED spotlight on the paper as well.

I recently bought a 1.25″ Celestron Oiii filter.  Amazon has them for a really good price.  Celestron says: Celestron Oiii Filter“The 1-1/4″ OIII narrowband filter isolates just the two doubly-ionized oxygen lines (496 and 501nm lines) emitted by planetary and emission nebulae, while blocking the rest of the overall spectrum of light.”    Let’s see!

Oiii_Blog

This thumbnail is a bit squashed, but if you click on it you can see it correctly.  The spectra at the top and bottom are coming through the slit unfiltered.  The blue green block on the left in the middle is what the Oiii is passing.  But does it pass 496 and 501?   For that, we need some software.  After trying an online app I didn’t like, I checked out RSpec.  I found RSpec to be easy to use and very flexible.  I’m on the 30 day free trial but I think it’s worth the full price of $99.  Maybe this post will go viral and they’ll comp me,  hmm?  Yeah, doubtful.

Celestron Oiii Curve

I calibrated my spectrograph with RSpec using the CFL. Then I brought in the Oiii filter spectrum.

In addition to generating the transmission curve, the software allows me to do neat things like label important wavelengths, and figure out Full Width at Half Max to show how narrow the filter is.  I haven’t figured out what the Y axis units are yet.

Anyway, it looks like it gets 501nm OK but barely transmits 496.  It does a great job blocking everything else out, but this filter really functions more like a line filter for 501 than how its described.  Of course, my setup could be calibrated wrong.  But I’ve read chatter that Baader makes Celestron’s filters and that Baader Oiiis have this characteristic (Baader does not claim their filter transmits both lines, that I could find).  I have an email into Celestron asking about this but they haven’t gotten back to me after a week.

[-Update:  I heard back from Celestron, as follows-

Yes, this transmits just the 496 and 501nm lines, but it’s not a double line bandpass.  The filter bandpass is broad enough to cover both lines as his graph shows. Also, the measurement would be very sensitive to tilt which would push the bandpass towards the red if the filter glass is not parallel to the spectrograph.

Yes, these filters are supplied by Baader, and the filter case also has Baader’s name on it.

So there you have it.  Guess I should have checked the packaging.  Others have noted these characteristics about the Baader Oiii, such as this web page which describes the curves nicely and this well designed analysis on Cloudy Nights.  I guess we could all be tilting our filters. 8^]

Next post:  Shooting through the Celestron Oiii and Meade Nebular Narrowband filters.  Which nebula to try out with the recently acquired EF 100mm f/2.0?


September 27, 2015 Lunar Eclipse

A supermoon eclipse isn’t that special unless you can get some landscape in front of it.  Even then, I think you’d be hard pressed to know it was a perigee eclipse unless you had it next to an apogee eclipse for comparison.  I will say it’s harder to fit inside the frame of my 2032mm SCT.

But since it was rising in totality, I was pretty excited to shoot it from my deck as it rose over the East Bay Hills.  Unfortunately there were some low clouds that prevented silhouetted tree shots.  Fortunately cloud cover was far less than earlier in the day.

Here is my favorite, with the new 100mm F/2 lens.   Shot at ISO 800, f/10, for 10 seconds.  I was tracking, so the city lights are a little blurry, but the moon is nice and sharp.

20150927 Eclipse rising 100mm iso400 f10 10sThe next two are emerging from shadow, through the C8.
2032mm ISO1600 f10 1s20150927 Emerging from shadow 2 2032mm ISO1600 f10 2.5s20150927 Emerging from Shadow

1000mm SCT ISO 800 f10.3 3.2s.  A tad out of focus.20150927 Eclipse 1000mm iso800 f10 3.2s

Further Filter Fun

I was really curious about how the characteristics of my filters differed, so today I built a spectrograph get a better idea.   I had the diffraction grating in hand with the idea of building a spectroscope at some point.  I took some pics of the build which I’ll post at a later date.

Filter Comparison SpectrographHere is an image of a fluorescent bulb spectrum (for the nice emission benchmarks) and how each filter interfered with it.


Piggyback – Second Night – Cygnus

For the second night of weekend tests I decided to shoot Cygnus.  There were some good reasons to choose Cygnus.  I could see four or five stars in the constellation (ha ha, seriously it was that bad) but that was enough to give me a good idea that I was framing the North American and the Veil.  It was also near zenith and away from that dratted Radio Shack sign.

I tried the final filter, a Meade 4000 Nebular Narrowband.   Finally, a filter with a descriptive label!  Plus, I found a light curve for it:

Meade Narrowband Nebular Filter Graph

Probably not much different than the others, but it seems higher quality and a little larger.  It is darker though (more narrow, perhaps), and harder to focus.  It took me about half an hour to find Vega in live-view.  Once in focus, I lined up Cygnus as best I could.

I’d left the wedge-pod set up from the previous night, and just dropped the scope on it again without realigning.  I told my timer to take thirty 1½ minute exposures and let it do its thing  for 3/4 hour.  Then I shot ten 1½ minute darks and a bunch of bias and flats.  I had to throw out 6 lights that were corrupted by airplanes, but stacked the rest to give me a 36 minute exposure.   Here it is, as well as a key I made for it from my previous star charting digital data.

Cygnus, 36 minutes, f/4.5 (50mm f/1.4 lens), ISO 800
(click each full size image into a different tab in your browser, and you can go back and forth between the image and the key)

Picture saved with settings embedded.cygnus_key

Piggyback – First Night, with Filters and Guiding

In the last post I discussed some filter and balance enhancements I made to my piggyback setup.  This first night of testing it I started by trying out an unlabeled and ugly looking Lumicon filter.  The box said Lumicon Blankit transmits as follows: OIII (496) 96%, OIII (501) 94%, Hß (486) 92%.  It seems to transmit  Hα as well, since the California Nebula comes out pretty red in this 5.5 minute guided exposure (f/3.5).  There is a really bright Radio Shack sign not far from where I was pointed, and the filter was not able to block the glare well.

The next Lumicon filter was labeled “Galaxy” but that lettering seemed intentionally removed, like they were reusing an old mount.  Like the other, I’d removed it from the mount and placed it as a camera body clip-in of my own making as described in my previous post. Its transmission specs are OIII (496) 86%, OIII (501) 84%, Hß (486) 82%, Hα 95%.  I also added a hood to the lens in hopes of cutting down nearby light wash.

I tried two apPicture saved with settings embedded.proaches with this filter, and both used a number of dark, flat, and bias frames stacked with multiple light frames.  First was three, 5.5 minute exposures, manually guided (ISO 800, f3.5).   The final 16.5 minute image looks like this after processing:

Next I tried ten 1.5 minute exposures, but did not guide the Picture saved with settings embedded.piggybacked camera with the main scope this time.  I had drift aligned the scope pretty thoroughly, however.  Here is the final 15 minute image (ISO 800, f3.5).  The stars look as good or better than the manually guided one, and the overall image a little better.  Yes, that’s the Pleiades on the right.  Seeing conditions were poor, with a limiting magnitude of around 3.

So the lesson I learned here is that I don’t need to manually guide when using the 50mm lens on my mount, if the mount is well-aligned and properly balanced.   That’s good, because after 16 minutes of manually guiding the scope I’m pretty done with that and ready for some autoguiding if guiding is needed.   In the next post I’ll talk about the second night of this configuration, using a different filter and a lot of unguided 1.5 minute exposures.